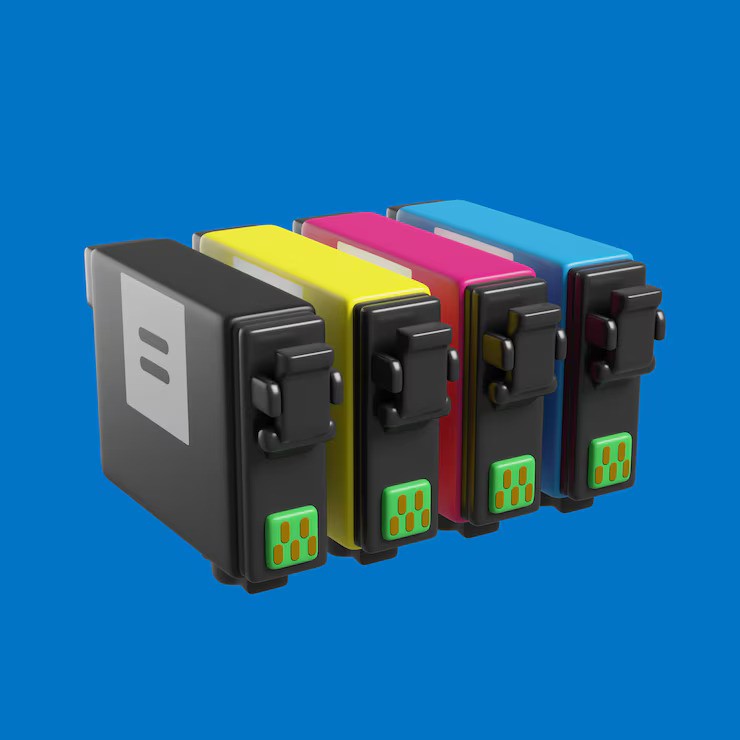
Ink cartridges are vital components of any inkjet printer, but they can sometimes become clogged, leading to poor print quality or even complete printer malfunction. Cleaning clogged ink cartridges is an essential maintenance task that can save you from frequent cartridge replacements. In this blog, we’ll walk you through ten practical steps to clean clogged ink cartridges effectively.
1. Identify the Problem
Before diving into cleaning, it’s crucial to identify whether the issue is indeed a clogged ink cartridge. This initial step saves time and effort.
Ink cartridges can clog for various reasons, such as infrequent use, dried ink, or exposure to air. Start by running a diagnostic test from your printer’s maintenance menu. Most printers offer a “Print Test Page” or “Nozzle Check” option. If the test page displays gaps, streaks, or faded colors, the ink cartridge is likely clogged.
Additionally, ensure that the problem is not related to other factors, such as low ink levels or a malfunctioning printer head. By ruling out these possibilities, you can focus solely on cleaning the clogged ink cartridge.
2. Gather the Necessary Supplies
Having the right tools and materials at hand will make the cleaning process smoother and more efficient.
You’ll need a few basic supplies: warm distilled water, paper towels, a soft cloth, and, if possible, a syringe with a rubber tube. Distilled water is preferable because it doesn’t contain minerals that might further clog the cartridge. Also, ensure that your workspace is clean and well-lit to avoid any accidental spills or mishandling of the ink cartridge.
Additionally, it’s a good idea to wear gloves to protect your hands from ink stains. By gathering everything you need beforehand, you can ensure a hassle-free cleaning experience.
3. Remove the Ink Cartridge from the Printer
Carefully removing the ink cartridge is essential to avoid damage to both the cartridge and the printer.
Begin by turning off the printer and unplugging it from the power source. Open the printer cover and wait for the cartridge carrier to move to the center. Gently press down on the cartridge to release it, and carefully lift it out. Avoid touching the copper-colored contacts or the nozzles, as this could cause further clogging or electrical damage.
Once removed, place the cartridge on a piece of paper towel with the nozzle side up. This position will help prevent any residual ink from leaking onto your workspace.
4. Clean the Cartridge Nozzle
The nozzle is the part of the cartridge that releases ink onto the paper, and it’s the area most prone to clogging.
Dampen a soft cloth or a paper towel with warm distilled water. Gently wipe the nozzle in one direction to remove any dried ink or debris. If the clog persists, you can place the nozzle side of the cartridge in a shallow dish filled with warm distilled water. Let it soak for a few minutes to loosen any hardened ink.
After soaking, dab the nozzle gently with a dry paper towel to remove excess water. Avoid using excessive force, as this could damage the delicate nozzles.
5. Use a Syringe to Flush the Cartridge
Flushing the ink cartridge with a syringe can help dislodge stubborn clogs that simple cleaning methods can’t resolve.
Fill a syringe with warm distilled water, and attach a rubber tube to the tip of the syringe. Carefully insert the tube into the ink port of the cartridge. Slowly push the plunger to inject water into the cartridge, which can help break up clogs inside the nozzles. Be gentle to avoid applying too much pressure, as this could damage the cartridge.
Once you’ve flushed the cartridge, use a paper towel to wipe away any excess water. Allow the cartridge to air dry completely before reinserting it into the printer.
6. Perform a Self-Cleaning Cycle
Most printers come equipped with a self-cleaning function designed to clear minor clogs without manual intervention.
After reinserting the ink cartridge into the printer, access the printer’s maintenance menu and select the “Clean Printhead” or “Deep Cleaning” option. This process forces ink through the nozzles to clear any remaining blockages. It may take a few minutes to complete, and you might need to run the cycle multiple times for severely clogged cartridges.
Keep in mind that each self-cleaning cycle uses a small amount of ink, so it’s best to use this option only when necessary. If the clog persists, you may need to repeat some of the previous cleaning steps.
7. Test the Cartridge
After cleaning, it’s important to verify that the ink cartridge is functioning correctly before resuming regular printing tasks.
Print a test page or a color grid to check the quality of the output. Examine the printout for any streaks, gaps, or faded areas. If the print quality has improved, the clog is likely cleared. However, if you still notice issues, you may need to repeat the cleaning process or consider replacing the cartridge.
Testing the cartridge after cleaning ensures that you don’t waste ink or paper on low-quality prints and helps maintain the longevity of your printer.
8. Reinsert the Cartridge and Run a Print Test
Once you’ve confirmed that the cartridge is clean and functioning, carefully reinsert it into the printer.
Ensure that the cartridge is securely placed in the carrier, with the contacts aligned correctly. Close the printer cover and plug the printer back into the power source. Run another print test to verify that the ink is flowing smoothly and that the colors are vibrant and accurate.
If the print test is successful, you can resume normal printing activities. If issues persist, the cartridge may be too damaged to salvage, and it might be time to buy ink cartridge replacements.
9. Prevent Future Clogs
Taking preventative measures can help reduce the frequency of clogged ink cartridges and extend their lifespan.
Regularly use your printer to keep the ink flowing through the nozzles. Even printing a small color document once a week can help prevent clogs. Additionally, store your printer in a cool, dry place away from direct sunlight and dust, as environmental factors can contribute to clogs.
Consider using high-quality ink cartridges and avoid refilling cartridges, as this can introduce impurities that cause clogs. Consistent maintenance and care can keep your printer running smoothly for a longer period.
10. Know When to Replace the Cartridge
Sometimes, even the most thorough cleaning efforts can’t revive a severely clogged ink cartridge.
If you’ve attempted multiple cleaning methods without success, it might be time to buy ink cartridge replacements. Over time, the nozzles can wear out, or the ink can become too dried out to flow properly. Continuing to use a heavily clogged cartridge can damage your printer, so it’s better to invest in a new one.
When purchasing a new ink cartridge, make sure it’s compatible with your printer model to avoid any further issues. Regularly replacing old or clogged cartridges ensures that your printer continues to produce high-quality prints.
Conclusion
Cleaning clogged ink cartridges is a simple yet effective way to maintain your printer’s performance. By following these ten steps, you can extend the life of your ink cartridges and avoid unnecessary replacements. Remember, consistent maintenance and timely intervention are key to keeping your printer in top condition.


